Let's talk about how and why you should hand wash your car.
Automated car washes use abrasive materials that may scratch or damage your car’s paint in addition to low-cost chemicals that contain high-pH. Washing your own car by hand will allow you to keep the vehicle and paint job in pristine condition and ensure you do not void manufacturer warranties for aftermarket products such as Paint Protection Film and Ceramic Coatings. Below we have listed everything you'll need to get started!

Everything you'll need to hand wash your car.
- 2-3 Wash buckets with grit guards - Water with Soap, Water, and Wheels Only
- 1-2 Wash Mitts
- Bristle Brush for Wheels
- Foam Cannon
- Preferred Washing Solution
- Microfiber Towels
- All-purpose Degreaser
- Mild Degreaser for Bugs
- Looking for a kit to get started? Click here to check out Chemical Guys Chromprehensive Clean, Shine, and Protection kit.
The following steps have been established to yield the best results while minimizing the potential for you to further damage your vehicle's paint.
- Find a suitable location to wash your vehicle. If possible, do not park your vehicle in direct sunlight. This minimizes the chance your vehicle will become hot while washing and reduces the risk of your car drying prematurely which can lead to splotches on your paint. Prepare your tools/buckets and solutions prior to getting started.
- It's time to get started! First, you want to loosen/soften any dirt and debris that may be on the vehicle. If you are using a pressure washer, do not get too close to the paint. Staying 18"-24" away is recommended along with staying away from any existing paint damage and seals.
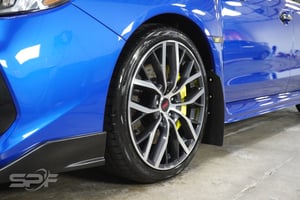
- We recommend you start with your wheels first as they are often the dirtiest part of your car. This will prevent any dirt and debris from landing on your already-clean car (it is recommended to have a dedicated bucket, wash mit, and brush for your wheels). Start by spraying the wheels with your wheel cleaner/degreaser. Then use your bristle brush to remove large debris from the wheels, tires, and inner fenders. You also have the option of using a smaller woolie wheel brush along with the mit to get into the hard-to-reach areas.
- Now that the wheels are done, let's move on to the body. Before you get started washing your car, be sure to soak your mit(s) in the soapy water (this is where your two buckets come into play, one with water and soap and the other with water). This will help ensure any grit inside the mit has been removed (we highly recommended grit guards). First, you will want to use a mild degreaser to help loosen dead bugs and other contaminants. Once you have applied your degreaser you want to use your foam cannon to coat the entire vehicle. When washing your car with a mit, it is important that you do not apply pressure (this will prevent you from pushing any remaining dirt and contaminants further into the paint potentially scratching your vehicle. It is recommended that you rinse your mit in the "water only" bucket then back into your water and soap mixture. When washing your car, use a grid pattern, this will help ensure you wash the entire surface. Always start from the top and work your way down, the bottom of your vehicle will usually be the dirtiest.
- You're almost done! Now that you have cleaned the entire vehicle, it is important that you rinse all of the remaining soap and debris from top to bottom. When drying your vehicle a blower is a great tool. Once again you are going to start at the top and work your way down. We recommend having two microfiber towels, one for the majority of the water and the second to get any additional moisture (once again you do not want to apply any pressure just like the mit). Once you are done drying the exterior, be sure to wipe down your door jambs and trunk area if applicable as it is likely water has accumulated there during the wash.
That's it! Should you have any additional questions, feel free to contact our office by email or phone.
.jpg?height=200&name=Tesla%20Model%20S%20Vinyl%20Wrap%20Installation%20(blog%20format).jpg)